Wrist care is important and makes sense, whether you’re a professional athlete or a keyboard warrior who spends hours each day banging away at your desk.
All the minuscule muscles in your hands and wrists will overdevelop if you spend the entire day sitting at a desk. Chronic pain may then develop. Here are a few yoga poses that can help lengthen and strengthen your wrists to relieve pain and prevent injury.
Yoga Poses To Reduce Wrist Pain
Reclining Seated Mountain
Stretching the muscles and joints nearby is necessary in order to open a joint properly. That’s what this pose does for you.
Keys to the pose:
* Start seated upright on the floor.
* Put your hands down behind you on the ground. Depending on where you feel the best stretch, experiment with the fingers’ direction. Whatever you decide, make sure your hands are balanced with one another.
* With your palms flat and fingers evenly spaced, lean back on your hands.
* As you take a breath, lengthen your spine and push the floor away. Exhale, opening your chest and heart forward while pulling your shoulder blades together behind you.
* Focus on your breathing and perform this movement for one minute.
Inverted Table
Continue to extend your wrists, forearms, and entire shoulder girdle. In order to make it a complete yoga pose, gradually incorporate the strength component of the arms when you lift up.
Keys to the pose:
* As you sit down, spread your fingers wide and place your palms flat on the floor behind you.
* For the best stretch for you, make sure you determine the best angle for your fingers to point. Keep your feet flat and your knees bent. Put equal amounts of weight on your hands and feet.
* Lift your hips off the ground while taking a deep breath, eventually aiming to lift them to your knees. Inhale, then breathe out and re-enter.
* As you push into your hands in the elevator, push the floor away while gently pulling your shoulder blades toward one another. When you lower, pause.
* Depending on your skill level, perform this for 1-3 minutes.
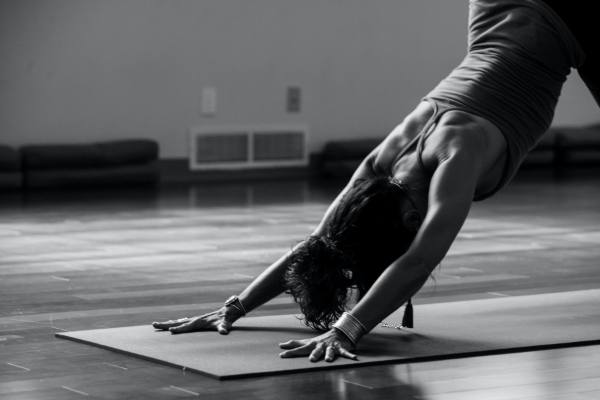
Downward Facing Dog
The benefit of this pose is that all the shoulder and arm muscles are strengthened at the same time as you receive a less intense, gently angled stretch on the wrist joint.
Keys to the pose:
* Place your hands shoulder-width apart with the palms flat and the fingers evenly spaced.
* A hip-width distance should be between your feet. Use bent knees for this pose to benefit your wrists.
* When you gently exhale, you should lower your head toward the mat while pushing the floor away with your inhalation.
* Hold this position for 30 to 60 seconds while taking deep breaths.
Wrist Turns
If you have tightness and pain in your wrist joint, this pose, which is known as the “kingpin stretch” for the wrists, should be considered a daily move. To avoid being overly aggressive when you first perform this move, approach it slowly and with awareness.
Keys to the pose:
* Begin by getting on your knees. Make sure your shoulder joint is directly beneath your wrist joint.
* At a time, extend one wrist. Turn your right wrist to the right, a little bit at a time, until your fingers are one day pointing in the direction of your body.
* Take a deep breath in, push the floor away, lengthen your neck away from your shoulders, and hold for a full 30 seconds. Slowly leave it and change sides.
* Twice on each side, perform this maneuver.
Upward Bound Fingers Pose
Place your hands on top of your head, palms facing up, while either standing or sitting. Snugly interlace your fingers at the webbing of your hands.
As you start to extend your arms skyward and turn your palms upward, shrug your shoulders away from your ears. Hold for 30 seconds.
Reverse Wrist Openers
The wrist joint has been stretched in all the preceding moves, but this move is special because you will finally experience a wonderful extension stretch. It might feel strange at first because it’s not a stretch you do or feel frequently, so take it slow.
Before you know it, the tiniest muscles in the wrist joint will start to release, and you’ll finally feel new freedom and flexibility in your wrists.
Keys to the pose:
* Begin by getting down on all fours. Put your left wrist, palm up, and under your shoulders. Fingers should be evenly spaced.
* To gently press down on the left hand, place your right hand on top of your left wrist.
* Reach your limit by leaning into the stretch, after which you should hold it for 30 to 60 seconds while breathing.
* Leaning away from the stretch and releasing your left wrist gradually will help you to recover.
* Do the same with your right hand.
Stretches To Reduce Wrist Pain
Extended Arms
Put your arms straight out in front of you while sitting. Your fingers should be pointing upward as you flex one of your wrists. Retract your fingers toward your body with the aid of the other hand. Hold on to it for 20 to 30 seconds.
Then, bend the wrist so that the fingers are pointing down. Gently nudge the flexed hand toward the body with the other hand. For 20 to 30 seconds, maintain this. On the other wrist, repeat both stretches.
Clenched Fists
With your palms facing one another, extend your arms straight out in front of you. Make a fist with each hand, then slowly bend your wrists, bringing your knuckles closer to your body.
As far as you can comfortably manage, bend the wrists, then hold the position for 15 to 20 seconds.
Side Thumb Stretch
Straighten your arms in front of you, palms facing one another. Fold your fingers over the thumbs as you flex your thumbs toward your palm.
Observe the stretch in the region surrounding the base of the thumb as you slowly press the pinky side of your hand toward the ground. Hold for 20 to 30 seconds.
Wall Stretch
Standing up, extend your arm straight out in front of you, and place your hand flat against the wall with the palm facing up.
Pull your fingers back very gently with your free hand until you experience a stretch. Hold for 20 to 30 seconds. Do the same with the other wrist.